Blocks Area
Control
🎮 Control – Your “Conductor”
What it is: Blocks that dictate when and how instructions are executed.
What it does: It decides the pace and order of your program.
Example: Repeat an action indefinitely (loop), wait a certain amount of time, or execute something only once.
👉 It’s the conductor who organizes everything.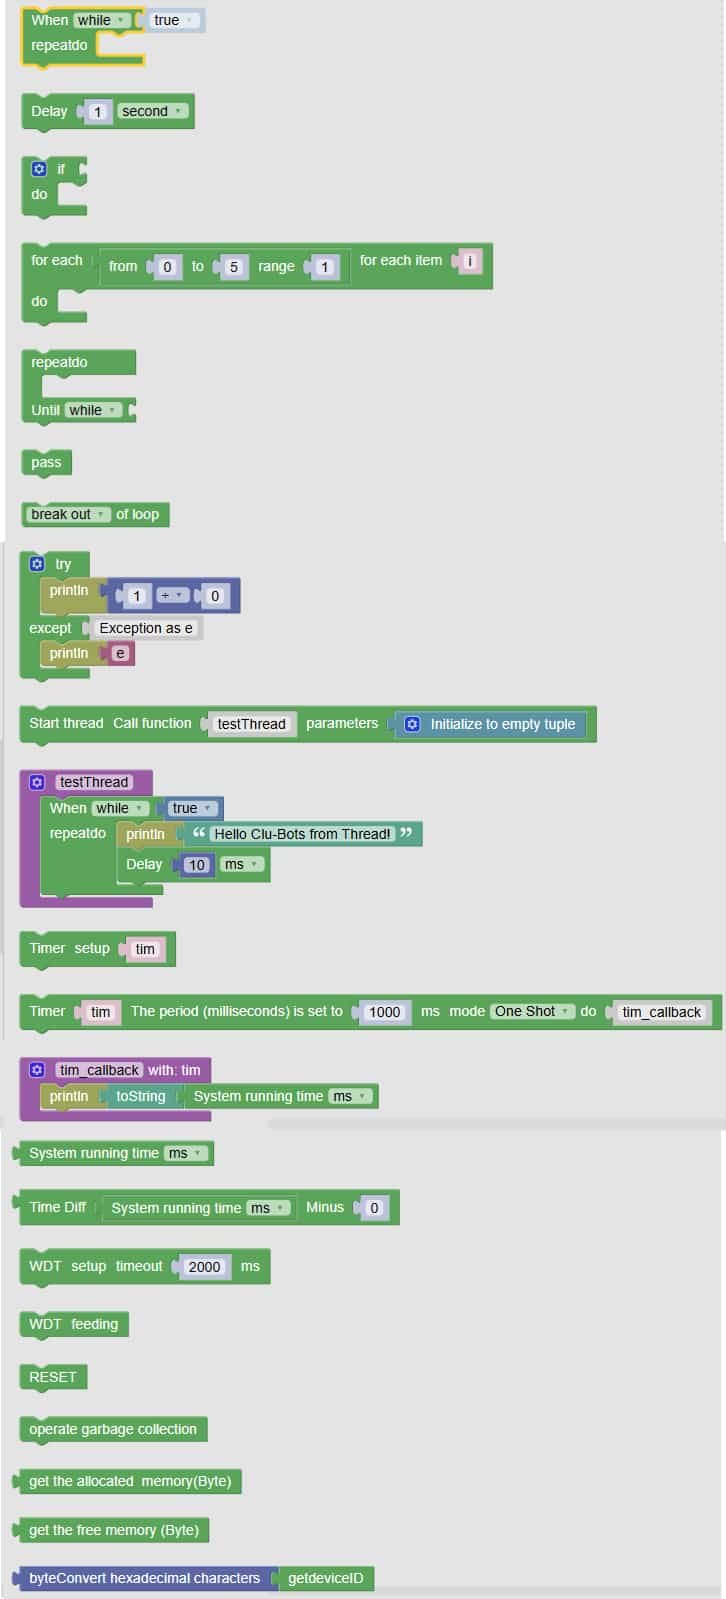
🧩 Fun Guide to Control Blocks (Clu-blocks Pro)
⚠️ Important! Control blocks decide when, how often, and under what conditions your robot does things. They’re like the director of a movie — without them, your robot just sits there waiting for instructions!
| # | Block | What it does | Dropdown options | What the options mean |
|---|---|---|---|---|
| 1 | When while_test true |
Starts a loop that runs while a condition is true | — | Keeps repeating as long as the condition stays true |
| 2 | repeat 10 |
Repeats the blocks inside 10 times | — | You choose how many times to repeat — great for animations or patterns |
| 3 | Delay 1 Second |
Pauses the program for a moment | second, ms, us |
– second: 1 second– ms: milliseconds (1000 ms = 1 sec)– us: microseconds (super tiny pauses) |
| 4 | for each i from 0 to 4 range |
Loops through numbers from 0 to 4 | — | Useful for counting, repeating actions with a changing value |
| 5 | Try / Except |
Tries to run a block — if it fails, does something else | — | Helps avoid crashes — great for testing risky actions |
| 6 | Break out of loop |
Stops the loop immediately | break out, continue with next iteration |
– break out: exit the loop now– continue: skip this round and go to the next |
| 7 | Start thread |
Starts a separate task that runs in the background | — | Lets your robot do two things at once — like blinking and listening at the same time |
| 8 | def testThread |
Defines what the thread will do | — | You write the actions that the background task should follow |
| 9 | Timer setup tim |
Sets up a timer that runs after a delay | Mode: One Shot, Repeat |
– One Shot: runs once– Repeat: runs again and again |
| 10 | tim_callback with tim |
What happens when the timer finishes | — | You decide what the robot should do when the timer goes off |
| 11 | System running time ms |
Gets how long the robot has been running | — | Useful for tracking time or creating time-based actions |
| 12 | Set setup timeout 2000 ms |
Sets a timeout limit for actions | — | After this time, the robot will stop waiting and move on |
| 13 | WDT feeding |
Keeps the system alive and prevents freezing | — | Like giving your robot a snack so it doesn’t fall asleep! |
🧠 Quick Tips for Students
- Loops = repeat magic: Use them to make things happen again and again.
- Delays = timing control: Perfect for blinking lights or waiting for input.
- Try/Except = safety net: Helps your robot recover from errors.
- Threads = multitasking: Your robot can do more than one thing at a time!
- Timers = scheduled actions: Great for reminders, alarms, or timed reactions.